This is a full write up about my setup for LaTeX, fully describing the environment, the editing, and the publishing process.
Table of Contents
- The LaTeX Environment
- My LaTeX Lecture Notes
- My LaTeX Editing Environment
- Accessing My Notes From Anywhere
Foreword
Inspired by this post on Reddit on someone else’s workflow, I decided to kick things up a notch and bring even more of the similar ideas on board. There will be many parts of which may take a lot of effort to emulate, but hopefully this in-depth plunge into my setup can give you ideas on how you can make your own experience of using and writing in LaTeX more enjoyable.
This is not your tutorial to how to use LaTeX. I do not proclaim myself a pro at LaTeX at this point, and so I do not think I am eligible to write a even an introductory passage to using LaTeX. You are free to ask me how to do certain things and I’ll gladly answer them to the best of my abilities or point you to the right resources.
Due to how I use my computer and the nature of my setup, here are some knowledge that I expect the reader to know or be familiar with before delving forward.
- familiarity with the command line (cli) and terminal environment is required; and
- basic familiarity with how LaTeX and TeXLive works;
- basic familiarity with regular expressions (pattern matching and groups);
- already have TeX installed on your system.
It is important to note that my system environment is probably very different from yours. The following is a general outline of how my system looks like.
- Operating System: archlinux
- Desktop Environment: Strictly speaking, I have xfce installed, but I rarely use it. My daily environment is what follows.
- Window Manager: Binary Space Partitioning Window Manager (bspwm) with Simple X Hotkey Daemon (sxhkd)
- Shell: zsh
- Font: Hack Nerd Font, picked mainly for the icons
The LaTeX Environment
I do not think I’ve made any customization to my LaTeX environment post-installation. But the following are noteworthy to understand so that we can make full use of what the environment offers.
kpsewhich command
This is a very useful cli tool. It should come installed with your TeXLive copy.
- You can find out what your TeX environment variables are, which is impossible to locate post-installation should you not use this tool. For example, if you’ve forgotten where your
$TEXMFHOMEis, simply runkpsewhich --var-value=TEXMFHOME - You can check if your ‘global’ files that you’ve put into
$TEXMFHOMEis being properly detected, by runningkpsewhich mystyle.styif you want to see if
mystyle.styis being properly detected by TeXLive.
The TEXMFHOME directory
I am not fully familiar with every one of the directories of which we saw in the installation process, but the $TEXMFHOME directory is where I make magic happen. This is where you can put your own .sty files (or even .tex) files if you want them to be accessible everywhere in your user environment.
In particular, I put my .sty and .tex files that I want to be globally accessible, like my colorschemes, commonly used preambles, and document classes, in $TEXMFHOME/tex/latex/. You may be familiar with my TeX notes repo, where my notes live, and my little LaTeX toolbox of personal classes and styles (e.g. colorschemes).
My LaTeX Lecture Notes
This section serves to discuss the structure and ideas behind how I’ve designed and laid out my lecture notes. I figured that it deserves its own section because it is, right now, my most used document class/style. Having it here also allows referencing from other parts of this post if needed.
Granted, in my opinion, I do not have the most ideal of LaTeX document preambles. It is a Frankenstein-like monster, and you’ll see why in this section.
Tufte style
Have I preached you on the greatness of the Tufte style to documents, and even certain webpages? Sidenotes and margin notes are undistracting, unlike footnotes. Smaller margins on the main text means easier line travelling for your eyes. Larger margins on the aside means I can put away smaller figures that supplement the text, which means less breaking of the main text, again, a removal of perhaps unnecessary distraction.
However, the Tufte-LaTeX package is largely unmaintained. I am looking for alternatives. So far, I have my eyes on yLaTeX and kaobook. Due to that, there are things here and there that are broken or incompatible with what I need. I also have my own personal styles to my notes. The default look and feel of the tufte-book class, provided by the Tufte-LaTeX package, is good, if, in my opinion, it is for a book that you don’t pick up too often. For a notebook meant to be frequently used, extremely fast eye-scans, a whole lot of cross-referencing, etc., quite a number of things need to be done to make the document class into the ideal notebook. Common note-taking techniques, such as colour-coding, symbols, etc, are not built into the document class.
Colour-coding environments
A quick and perhaps even beautiful solution is to colour-coding environments in LaTeX is to use tcolorbox, which will gives absolutely beautiful boxes to highlight definitions and theorems. I mainly study mathematics, and so the environments that I create are centered around what is generally needed in these topics. Unfortunately, the sidenotes and marginnotes implemented in Tufte-LaTeX document classes breaks with tcolorbox. This is due to how marginnotes and sidenotes are implemented in the tufte class, and that is by floating, which is limited by the box that the floating element lives in, and guess what, tcolorbox is made using boxes. It appears that kaobook does not have this issue. For the last few seconds I was skimming through the yLaTeX lecture notes class, it does not seem to have this problem too. Regardless, they only appeared long after I have created my workaround.
My workaround was to not use tcolorbox and use ntheorem for customizing the pre- and post-environment appearances by setting a coloured line to indicate beginning and ending of an environment. amsthm does not give me this option, which is why I chose to forgo it. This allows me to, for instance, ‘wrap’ the environment for a definition with blue lines and give the title the same blue colour.
Further, I also make use of fontawesome5 to add symbols to my environments and use them as little visual indicators around the notes. For example, my definition environment makes use of a little book icon . I also use the star icon from fontawesome to indicate importance.
ntheorem woes
With tcolorbox and amsmath out of the picture, I came to choose ntheorem for declaring theorem environments, but ntheorem brings me other woes. For instance, long titles in environments will overflow, i.e. the title will continue to print outside of the designated width, and even longer titles will be printed outside of the page. To rectify that, I have to look and ask for hacky patches and add them to my preamble. See my post at TeX StackExchange. The customizability of ntheorem is also rather limited and inflexible. I have around 150 lines of declarative code for ntheorem environments, 75% of which are repetitive.
Cross-reference all the things
I make use of cross-referencing extremely heavily, to the point that I decided to label almost every environment the moment they are declared. Cross-referencing is a lifesaver in notes. Dropping a properly linked reference somewhere in your document makes finding whatever that is being referenced an exercise that takes no effort at all save the click of a button. With the right document viewer (in our case, PDF viewer), it is also easy to go back to where you were sent from. As far as I am aware, only zathura does this, and it is a lifesaver. You can check out how I minimize the effort in labelling almost everything in my document in Inserting cross-references in the next section.
Also, the index! The index is almost always ignored in a book until when you absolutely need it. If you are ever in a situation where you can recall a certain keyword but cannot find where it is in the table of contents or even a list of definitions, you know you want an index of important keywords with several locations in the book where they are important. I use a similar technique to handle labels to handle declaring a new index point in the book.
You may have noticed that I have 3 big lists aside from the table of contents, that is a list of definitions, a list of theorems, and a list of procedures. These are, to my belief, my lifeline to spelunking in my notes that usually span 200 pages by the end of a semester.
My LaTeX Editing Environment
This section will be quite extensive. Anchors are provided for ease of navigation.
Section anchors
- Editor setup
- Starting a new document
- Inserting cross-references
- Making full use of Ultisnips
- Symbols concealment
Editor setup
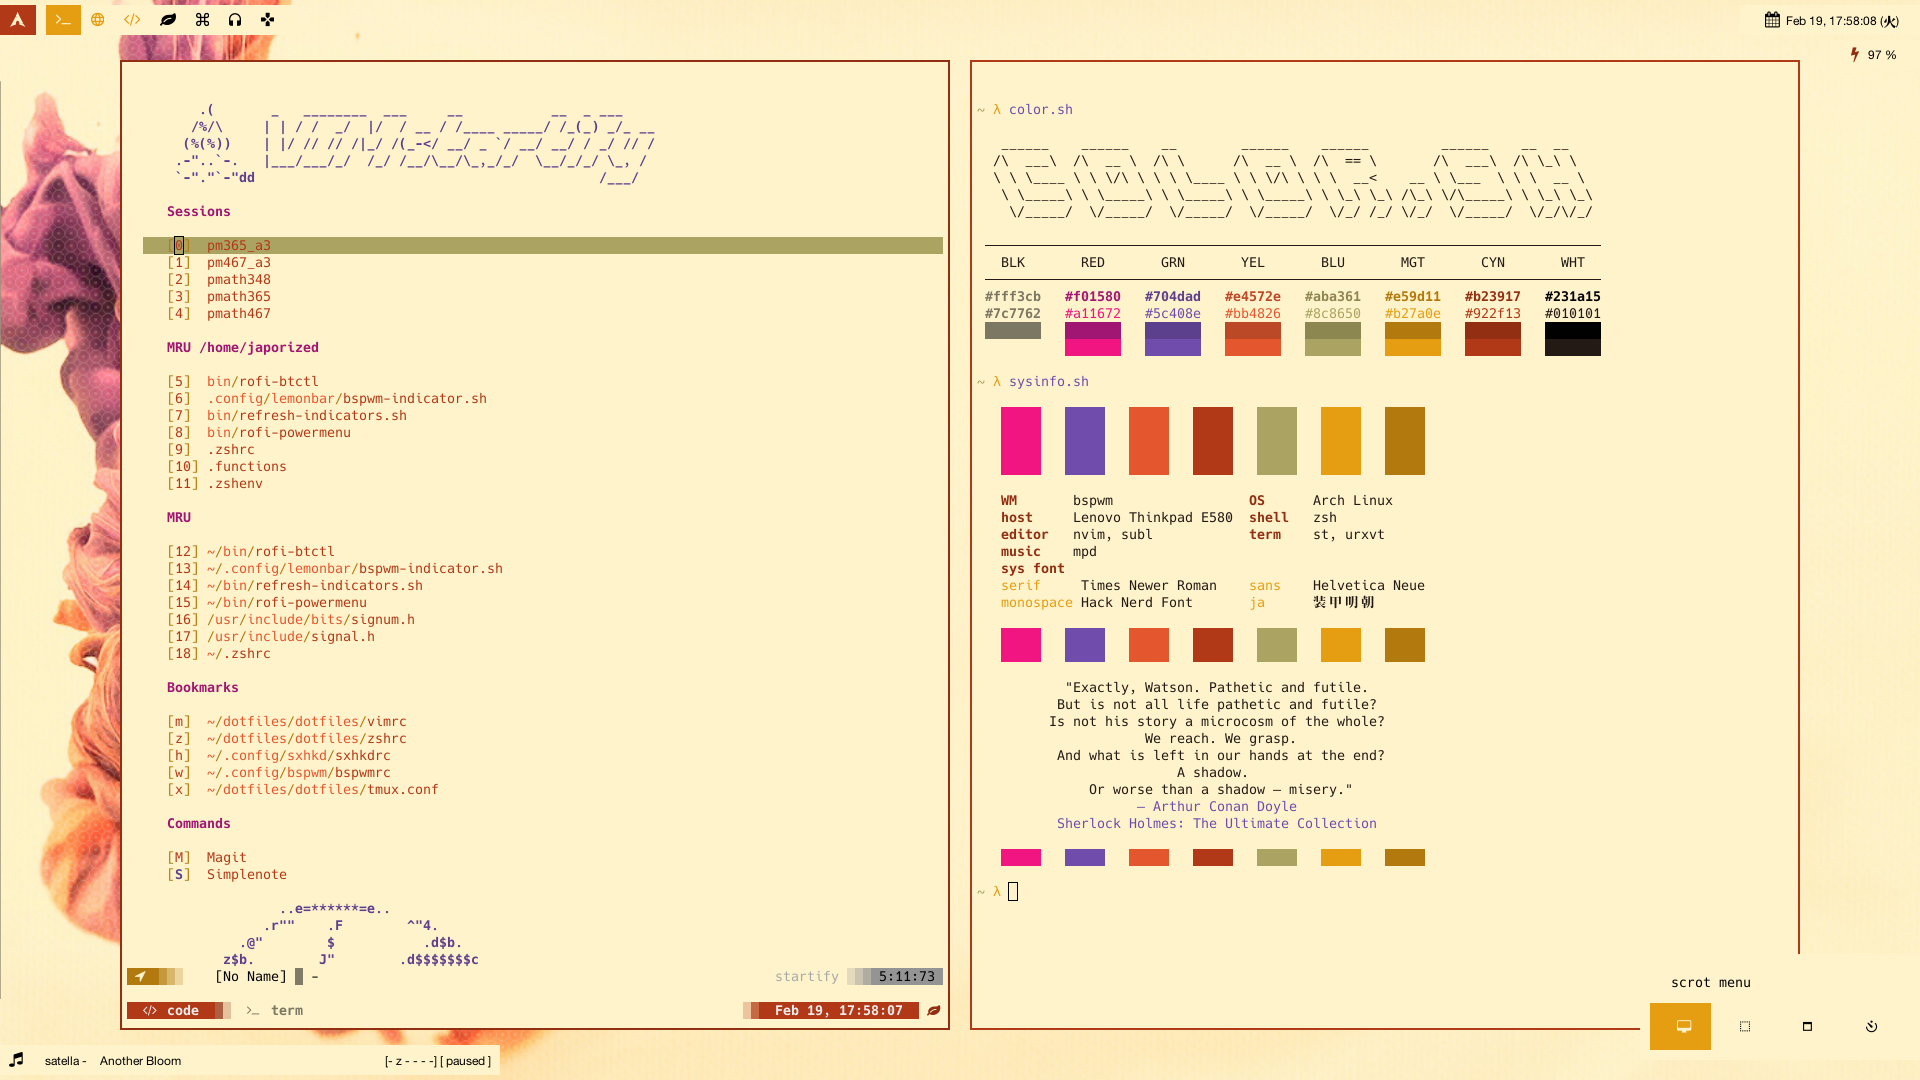
- Editor: neovim – My editor of choice that is keyboard-driven and almost fully-configurable
- vim/neovim plugin involved:
- vimtex – vimtex is my go-to vim-latex plugin of choice, and I rely on it for my setup
- UltiSnips – If vimtex introduces the gears to writing LaTeX in neovim, then UltiSnips is the grease that makes writing more enjoyable and closer to how one would write with pen and paper.
- vim-startify – A nice start screen while launching vim/neovim, but I mainly use it for accessing sessions and most recently used files
- vim-which-key – Takes out the responsibility of the brain memorizing every command at my expense
- coc.nvim – A completion engine that makes certain parts of the writing much easier, especially cross-referencing within a document, which I use very often
- denite.nvim – Integration with vimtex for fuzzy searching of labels, chapters, sections, etc., and other goodies
- vim-templates – My naive templating plugin that I love for starting new documents
I discarded the default keybindings that vimtex provides for building documents, and opted to define my own, partially in a more mnemonic way that suits my own memory, and allows me to better segregate the many commands that are available to me (for tex, for configs, for editor styling, etc.). Instead of having to look for keybindings through the config file when I come back to my setup after a while, I need only use vim-which-key to tell me what my keybindings are the moment I hit my leader key.
Starting a new document
I have 2 ways to start a new document.
- If the document I wish to prepare is a note-like document (lecture notes, reading notes, etc.), I jump into my
TeX_Notesdirectory and run./scripts/newnote "my-new-note"where all the
newnotescript See the code fornewnotehere. does is- create a new directory called
my-new-noteinTeX_Notes; - create a subdirectory in
my-new-notecalledimagesfor figures and actual image files (if any); - creates a
.texfile for generating a dark version of the note document; and - creates an empty
references.bibfile and an empty main.texfile.
By default, the name of the file is
classnotes, but passing a second argument will change this name. For sake of clarity and succinctness, I shall call the main.texfileclassnotes.texOnce that is in place I begin editing
classnotes.tex, which is an empty file. - create a new directory called
- If the document I wish to prepare is just a generic
.texfile without any complicated setup (i.e. no dark version, bibliography, lots of figures, etc.), then I just start editing a new.texfile. This is the no-strings-attached setup that I have for myself, so that I never have to remember that there is some special thing I have to do if I just want to create a simple new document.
In any case, either I edit classnotes.tex or just newdoc.tex, using vim-templates and denite.nvim, I hit <Space>dtg to run :Denite gettemplates. This gets me a list of my templates that I have for LaTeX.
The more-involved setup is usually meant for my lecture notes, which I like keeping a bright and dark version. The build system from vimtex can only have one build sequence, so I have to look into automatically building the dark version separately. For that, I use a tool called entr, which watches my classnotes.tex file for changes, and runs a build on classnotes-dark.tex, which then outputs the dark version. Web developers may be familiar with task runners like gulp or Grunt. Entr is much less powerful, but couple it with some bash and it becomes quite the powerful addition.
To make life easier, I put together a little script in script/builddark that uses entr and latexmk. Whenever I need to do this dual-building, I fire up Tmux Tmux is my terminal multiplexer of choice. and run the script on a separate pane.
Inserting cross-references
I have not talked to many who write in LaTeX, but I have seen hints of how my professors write their cross-references in their notes to students. They are usually rather carefully selected to be short and requires some memorization of the label that was given to a reference point in their notes. I, for one, find that distracting. If I want a label, I don’t want to dig around my document looking for it. There are a few criterions that it needs to fulfill, both technically and in my book:
- uniqueness – this is required by the parser itself;
- keyword-driven – I should provide it with the necessary keywords so that I minimize the number of times I have to scroll through my document to look for what I want.
The latter makes it seem like my labels will be like a word jumble but it need not be. It may be long, but I do not have to type it all out when I have completion engines like coc.nvim. With a proper completion engine, I simply need to type out a keyword, and hopefully a good list of candidates will show up for me. All I need then, is just to select the desired label for referencing.
I do not want to always spend a few minutes struggling to figure out a good label for each environment. Another practice that I have is to do my best naming all of the important environments (e.g. definitions, theorems, propositions, etc.). This helps me find these important environments either by keyword, or just from reading their titles in the generated list of definitions, theorems, etc. See Cross-reference all the things. This is a practice that I will not give up on, and spending some time thinking of a good name for them is also a processing of the information that is presented in the environment. Why not make good use of this naming? Thus, for example, I would have the following shell to, say, the famous/infamous Axiom of Choice:
\begin{axiom}[Axiom of Choice]\index{Axiom of Choice}\label{axiom:axiom_of_choice}

\end{axiom}
What do I type to get this? Quite simple, and this is where the power of UltiSnips come in. thm<Tab>axiom<Tab>Axiom of Choice<Tab><Tab><Tab> (total strokes: 28).
Without snippets, I would have had to hit 93 keys, all by hand. With the default snippets from UltiSnips, it would still be 80 keys.
b<Tab>axiom<Tab><Esc>kA\index{Axiom of Choice}\label{axiom:axiom_of_choice}
With the power of regular expressions (regex) and the snippeting engine, I save a grand total of 65 keystrokes. To make things better, it follows how I would declare a theorem:
Declare
thmenvironment known asaxiom, titledAxiom of Choice
instead of…
Begin environment called
axiom, titledAxiom of Choice, indexed asAxiom of Choice, and labelled asaxiom:axiom_of_choice
which is lengthy and repetitive.
Granted, the regex looks hedious. It’s something that I’ve used from quite a long time ago, and I have no recollection of how I achieved this, or if I simply took it from somewhere. What it does is that it converts all symbols and whitespaces to underscore, and converts alphabets to lowercase. Basically, it tries its best to convert any string thrown at it into snake case. The regex tries to put all symbols and whitespace into group 4, and the Boost-Extended Format String Syntax converts anything from group 4 into underscores. To achieve this, each identification of a group 4 member needs to be one piece. For example, it must identify "} as one member of group 4 instead of two.
snippet thm "Theorem" b
\begin{${1:thm}}[${2:Theorem name}]${3:\index{$2}}\label{$1:$4${2/\\\w+\{(.*?)\}|\\([^\\"])|(\w+)|([^\w]+)/(?4:_:\L$1$2$3\E)/ga}}}
	$0
\end{$1}
endsnippet
To illustrate how I make use of cross-references, let’s take a look at an example done in my PMATH450 notes. The video also shows how I jump around my document between references, all on the keyboard without using the mouse or trackpad.
Making full use of Ultisnips
Regular expressions (regex) is powerful, and I am a happy convert. There are some frustrations that come with the subtler differences in standards and implementations, but overall, it has made editing LaTeX documents as “out of the way” as possible. We’ve seen in the last subsection how we can make use of regex in Ultisnips to greatly reduce our keystrokes that are wasted on repetition.
With math notations, regardless of how complicated it is, we do still try to read it in some way, and we do that for various reasons: communication, internalizing the information, etc. We can make use of regex to keep our preferred way of reading the notation, type in a way that is as close to our habit as possible, and let the computer do the formatting.
Simple example
It is often the case that we use the blackboard bold symbols in mathematics. Many resort to redefining a new command, like \bb, to create a “shortcut” to writing any of the blackboard bold characters. For the sake of an example, let’s suppose that we chose not to do this, and we want to keep \mathbb.
Since \mathbb typically takes only one capital alphabet, we can make the abbreviation, say bbr for \mathbb{R}, in our heads. We don’t want to hit shift if we can, and so we let Python (which is the language that Ultisnips uses) do the job.
context "math()"
snippet 'bb([a-zA-Z])' "mathbb" wrA
\mathbb{`!p snip.rv = match.group(1).upper()`}$0
endsnippet
The context "math()" portion comes from this post that was referred to at the beginning of this post. This is to restrict the triggering of the snippet to only in math environments, as detected by Vim, which, admittedly, is somewhat lacking. We can do the same for \mathcal, \mathscr and \mathfrak:
context "math()"
snippet 'cal([a-zA-Z])' "mathcal" wrA
\mathcal{`!p snip.rv = match.group(1).upper()`}$0
endsnippet

context "math()"
snippet 'scr([a-zA-Z])' "mathscr" wrA
\mathscr{`!p snip.rv = match.group(1).upper()`}$0
endsnippet

context "math()"
snippet 'frak([a-zA-Z])' "mathfrak" wrA
\mathfrak{`!p snip.rv = match.group(1).upper()`}$0
endsnippet
We quickly realize that there is some pattern to our snippets, and in particular, we can sum the 4 snippets up into a singular snippet as follows:
context "math()"
snippet '(bb|cal|scr|frak)([a-zA-Z])' "mathfont" wrA
\math`!p snip.rv = match.group(1)`{`!p snip.rv = match.group(2).upper()`}$0
endsnippet
To allow for the odd case where we may want to type a string of these characters, we can create the following snippet:
context "math()"
snippet '(bb|cal|scr|frak)' "mathbb" wr
\math`!p snip.rv = match.group(1)`{$1}$0
endsnippet
Notice the difference between the 2 snippets, especially at the end of the second line. This is a feature of Ultisnips. The difference is in the A option, which allows automatic triggering of the snippet without needing to hit <Tab>. This means that bbr would automatically get triggered to become \mathbb{R}, while bb will not do anything, and hitting <Tab> will then trigger the snippet, and replace bb with \mathbb{|}, where | is where our cursor will be.
Advanced example
The actuarial notation is a nasty monster to look at, and it’s not any better in LaTeX.
The usual way to read the above symbol, at least by the few actuaries that I know, is:
2nd moment of k bar A sub x angle n upper m
Using the packages actuarialangle and actuarialsymbol from CTAN, one would write the above as
\Ax[k \mid][2]{x:\angl{n}}[(m)]
which is nothing like the reading, and has little resemblance to the notation.
We can use Ultisnips for this, and try to keep as much of the reading as possible. First, let us consider more of the other forms of the notation, and for the sake of the example, let’s say the following are all the possible forms.

The code for the above notations are as follows:
\Ax[k \mid][2]{x:\angl{n}}[(m)]
\Ax{\itop{x}:\angl{\max\{n,15\}}}
\Ax{\overline{xy}:\angl{n}}
\Ax{15:10}[(12)]
\Ax[][2]{45}
It would be overly complex or extremely difficult for us to write a regex that will properly capture all cases, and in particular, follow our reading preference. We must then do some strategic sacrifices, which involves our knowledge about the notation.
For instance, the 2 to the upper left of the notation is a rare occurrence, at least within the scope of the course I was taking. So I can consider doing that manually when it arises. The lower right notation is always there, the lower left notation is also somewhat rare and only reserved for insurances with a deferred period, which is somewhat rarely discussed, but important nonetheless. The upper right notation is rather important since we do talk about periods that are less than a year (which is what the notation means). However, looking at the code, since the upper right notation is at the very end of the code, and we can read the notation with that notation as last, we can leave it out of our regex.
It is also important that we are able to carefully capture the notations in their appropriate groups so that we can extract them from the regex matcher.
With that conclusion, we decide that we want to be able to cover these reduced cases:
{k \mid}A{x:\angl{n}}
A{\itop{x}:\angl{\max\{n,15\}}}
A{\overline{x_n:y_m}:\angl{n}}
A{15:10}
{2}A{45.5}
Then in particular, we can design the regex in the following way:
({([0-9a-zA-Z\\\s]+?)})?A{([0-9a-zA-Z\\+\{\}\-,\.:]+)}
One may try out the regex and the test values at RegExr which has become my favorite tool to test my regular expressions before using them.
Notice how we optionally allow the lower left notation (with the ? quantifier), which we decided that it is common enough to warrant some love, but should be left optional.
There are several problems with this expression:
Ais a very common character to use. Fortunately, my habit is to always have spaces around capital letters in math mode, and the distinguishing feature of the above regex, is that it must at least have one character in the braces following right afterA.- Another problem with this regex is that it is greedy. For example, it will match
A{x:\angl{n}}+20_{\sigma}. Not allowing for whitespaces for the lower right notation minimizes this problem, but that comes at the slight price of readability.
Our final snippet format is the following:
context "math()"
snippet '({([0-9a-zA-Z\\\s]+?)})?A{([0-9a-zA-Z_\\+\{\}\-,\.:]+)}' "discrete insurance" wrA
\Ax`!p snip.rv = '[' + match.group(2) + ']' if match.group(2) is not None else ""`{`!p snip.rv = match.group(3)`}$0
endsnippet
group(2) is the optional lower left notation, and we use some Python code to check if it exists, and if it does, we include it in our final notation.
Let us now see it in action:
As a rule, life is not always pretty, but we can make it less ugly.
Symbols concealment
Compare reading this:
∀ x ∈ ℝ  ∀ ϵ > 0  ∃ δ > 0  ∀ y ∈ ℝ ⏎
\abs{x - y} < δ ⇒ \abs{f(x) - f(y)} < ϵ.
versus:
\forall x \in \mathbb{R}  \forall \epsilon > 0  \exists \delta > 0  \forall y \in \mathbb{R} \\
\abs{x - y} < \delta \implies \abs{f(x) - f(y)} < \epsilon.
Let’s look at another example: compare
Λ : (L₁(𝕋, ℂ), \norm{·}₁) → (c₀(ℤ, ℂ), \norm{·}_∞)
versus:
\Lambda : (L_1(\mathbb{T}, \mathbb{C}), \norm{\cdot}_1) \to (c_0(\mathbb{Z}, \mathbb{C}), \norm{\cdot}_\infty)
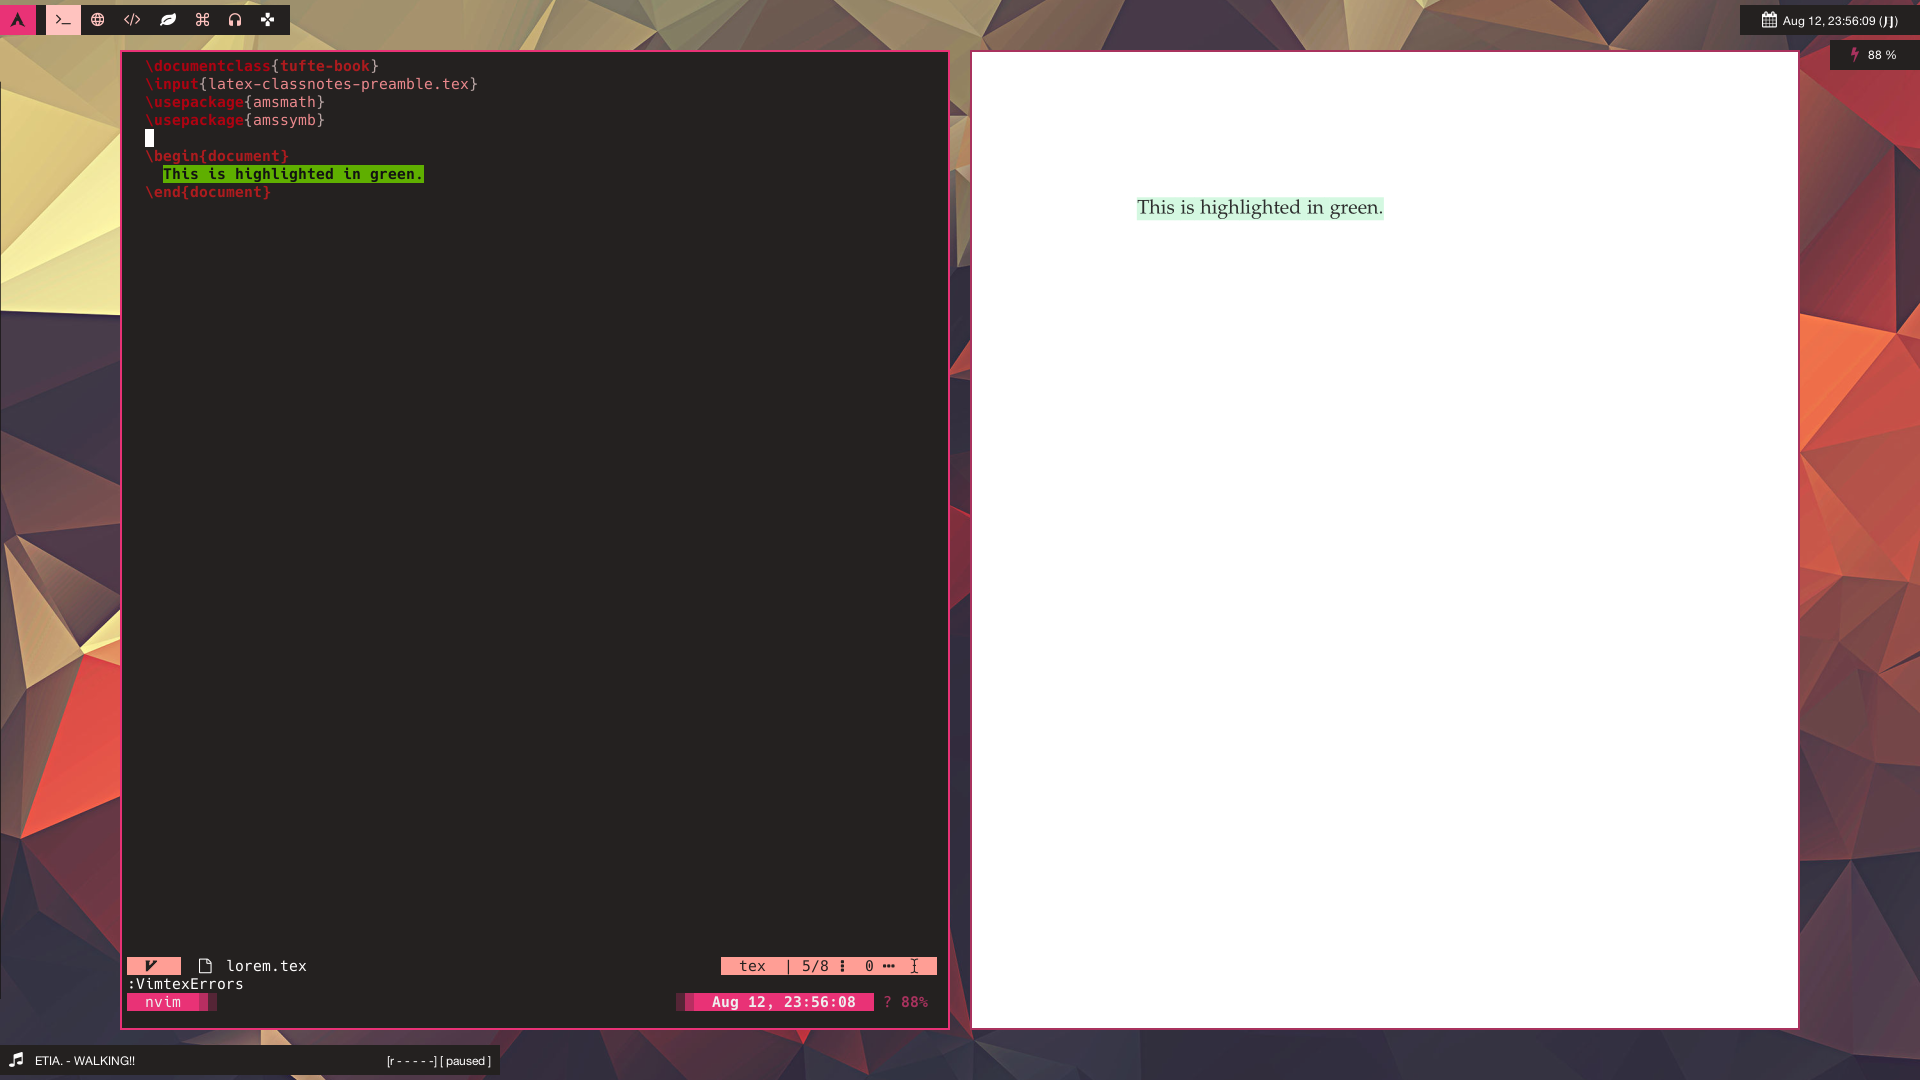
Some may prefer verbosity, but I let the symbols win on me for this one. For instance, I don’t want to look at \mathbb{T} and have to realize that it actually is 𝕋, cause that is distracting. Fortunately, Vim has syntax files that allows me to replace many of the blackboard bold, the calligraphic mathcal, etc, with their actual characters, through their feature called conceal. Vim even provides a default syntax file for concealing, for example, the greek characters and some of the common math symbols. One simply needs to enable the conceal feature, and specify the flags one desired as shown in :h tex_conceal:
set concealcursor=""
set conceallevel=2
let g:tex_conceal="abdmgs"
I further enabled the concealment for bold and italic characters (b flag), not only to show, say, \textbf{bold text} as bold text, but also for my personal highlighters, for instance, \hlbnotea for a green highlight, right in Vim.
You may refer to my probably-evergrowing syntax file.
Accessing My Notes From Anywhere
As mentioned, I host my notes on GitLab, and made a front page for them. It makes use of a simpler tech stack that this blog runs on, that is to use Jekyll, a static site generator. Some may wonder why use a static site generator at all when I can just throw all the links into an index.html file. It is much easier to put all the links into, say, a YAML file than to type out, or copy-paste, a bunch of repetitive HTML code that becomes painful to maintain if, say, I want to add a class for all the links to the PDFs. I also want to make the site rely on Javascript for as little as possible.
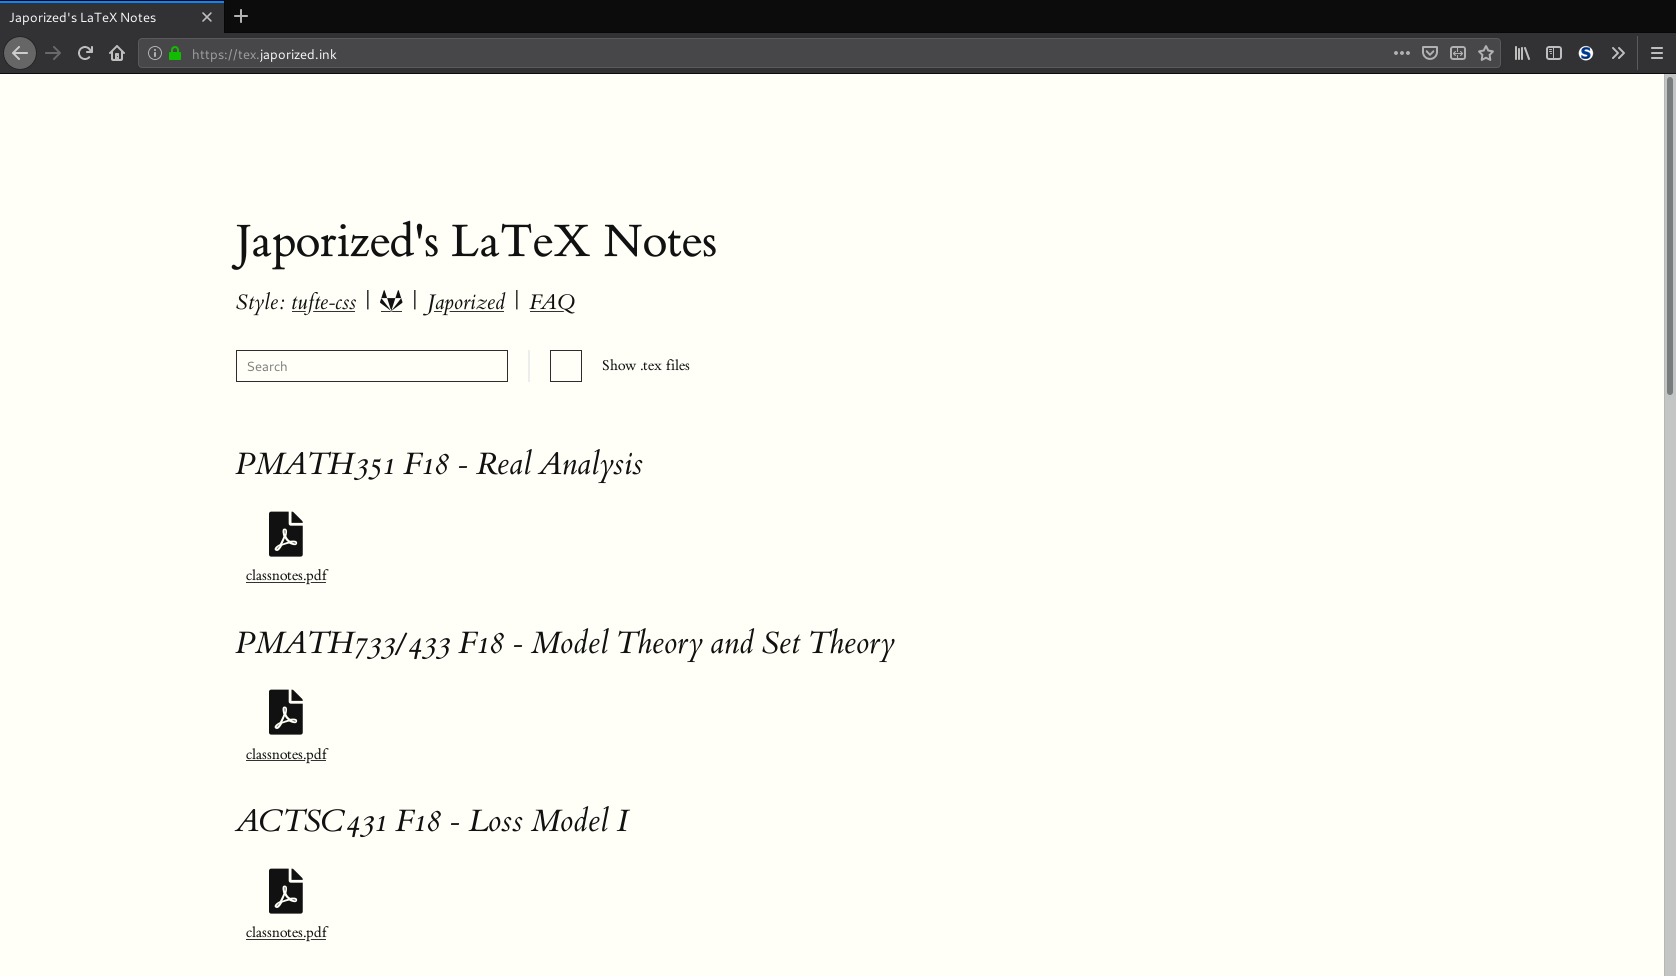
Tacking on a front page and giving it a nice address makes it easy to access my notes from any device that has access to the Internet and a browser. Forget logging in to cloud services, which you may want to use safe and secure passwords that may be hard to remember.
Plus, this makes it really easy to share notes with friends. :D
Concluding words
That about concludes what I have to share about my setup that I am rather proud of, despite it having flaws here and there. But I can usually fix them as they arise, since many of them are purely aesthetic or quality of life tidbits, and does not severely interfere with the actual workflow.
If something catches your fancy and you want me to elaborate more, please put down a comment and I’ll get to it.
Comments